Golf Simulator Projectors
Choosing the Best Golf Sim Projector.
What is Aspect Ratio and is it important with a golf sim?
How bright should a golf sim projector be?
What Resolution is best for golf sim?
Should I ceiling mount my golf sim projector?
What else should I look out for when buying a golf sim projector?
What projectors do you recommend for Golf Simulation?
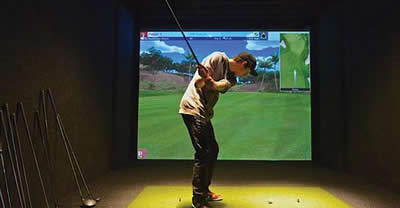
Golf Sim Projectors
With the use of a projector, launch monitor, impact screen, and a computer or tablet, you can turn your garage or rumpus room into a golfer’s paradise. Up your golf game in any weather in the comfort of your own home. The below Golf Sim buyers guide answers a few common questions and provides some expert recommendations for the best golf sim projectors you should consider.
Where does a Golf Sim projector need to be placed?
[top]Installation positioning is arguably one of the most important aspects you will need to consider when planning for your new Golf Sim Projector. Different projector models will have different installation distance requirements to project the desired image size. The ideal projector for your golf sim is one that can be installed in a position that correctly displays the desired image size whilst also:
- Positioned safely away from a player’s golf swing,
- Easily protected against wayward balls,
- Not positioned directly behind the player where the player casts a shadow on screen.
Every projector will have a required installation distance for a particular image size. To calculate the required distance (called Throw Distance), you would multiple the advertised Throw Ratio by the required image width. Please refer to our blog “How to calculate projector throw distance” for some more information. The Just Projectors website also features a Throw Distance Chart on every projector’s information page, providing you with the required installation distance for some popular image sizes. The Throw Ratio will be a critical specification to consider when selecting your new golf sim projector as it essentially tells you where the projector must be to fill up your screen correctly.
Standard (or Long) Throw projectors represent the bulk of projectors on the market. These models tend to sit at least a few metres back from the screen. As these projectors need to be placed further back they may result in the player needing to stand between the screen and projector, and therefore casting an unwanted shadow on screen. If you need to use a longer throw projector like these we recommend to place the projector very high up (if you have the ceiling height available), or placing the projector off to the left/right of the player… well away from the golf club swing. If playing a projector off-centre make sure the projector you purchase features horizontal keystone correction so you can correct for the angle distortion you will get.
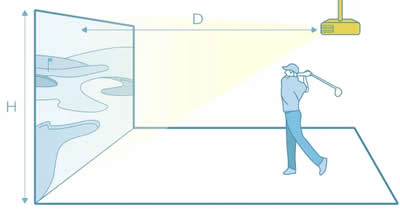
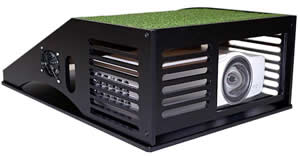
Short Throw projectors are the most popular for home golf sim as these are placed closer to the screen, usually between the player and the screen. This closer distance means there is no risk that the player will cast a shadow on screen. Depending on your screen size and the selected projector, the installation distance could only be 1 to 1.5m back. The projector can be instaled onto a ceiling mount or alternatively placed on the ground in front of the screen.
When using a short-throw projector you still need to ensure the player is not too close to the projector that the club could impact the projectors chassis, and you would need to include adequate protection from a mis-hit ball. Projectors can be protected from those bad shots by simply hanging a piece of matting at the rear of the projector to collect any ball that may go flying towards it.
What is Aspect Ratio and is it important with a golf sim?
[top]The Aspect Ratio of an image is a ratio of the image width vs its height, it tells us what ‘shape’ the image will be. Modern projectors tend to use a Full HD or 4K resolution, both of which are 16:9 aspect ratio resolutions. WUXGA, which is popular on computers, is a 16:10 aspect ratio resolution. Both 16:9 and 16:10 aspect ratios are the modern widescreen shape with almost all projectors utilising one of these.
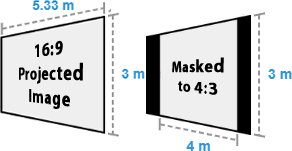
When using a FULL HD or 4K projector, with its 16:9 aspect ratio, you can expect an image with far less height than the width. For example, if you projected a 3m wide image you would receive an image height of approximately 1.7m. In some cases, customers require a projected image that will be higher, without necessarily increasing the image width. This is when playing with the 4:3 aspect ratio is required.
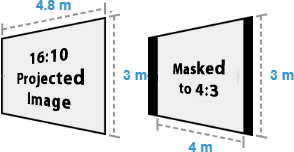
The 4:3 aspect ratio was common many years ago, with the SVGA and XGA resolutions, and offers an image closer to square. If you projected a 3m wide image in the 4:3 ratio, you would get an image height of 2.25m. Modern projectors do not natively feature a 4:3 aspect ratio chip however most can still receive and display the old XGA resolution if required. If you require an image with this extra height, then you would still use a 16:9 or 16:10 projector but would need to overspill the image width in order to increase image height.
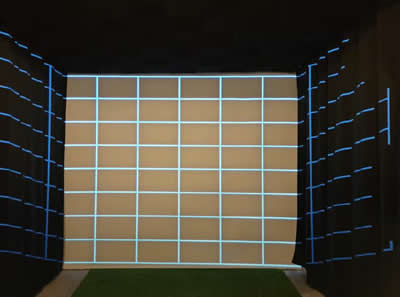
Overspilling the screen width refers to positioning the projector further back (or zooming the image out) so the image becomes larger resulting in the image width spilling over the edge of the screen. Once overspilled you then set your computer or software to a compatible 4:3 aspect ratio resolution (such as XGA 1024x768), doing this will black out the sides of the image. The end result will appear similar to when you are watching an old film or tv show on a TV and you get the black bars on the sides.
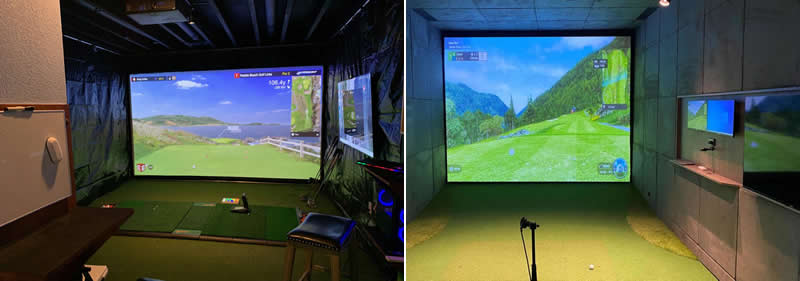
The below image is a projector (displaying a test pattern) that has been positioned further away so the height fills up the whole wall and the extra width is overspilled onto the side walls. When finally set up correctly the projector would only be projecting barely visible black onto the side walls, leaving you with an image filling up your whole screen.
The diagrams below further illustrate the concept of overspilling the image width in order to obtain a 4:3 aspect ratio image when using a widescreen projector. The image on the left shows a 16:9 projector while the image on the right is when a 16:10 projector is being used.
How bright should a golf sim projector be?
[top]How bright a projected image is will vary between projector models, for easy comparison most brands use the regulated ANSI Lumens or ISO Lumens measurement. The level of lumens you will require from a projector will depend on the image size being projected as well as how bright the room will be. A higher brightness level does not always mean better overall image quality though. Some high-lumen projectors may have reduced colour accuracy than a lower lumen alternative.
A projector with at least 3500 ANSI Lumens tends to suit most typical home golf simulators. For large image sizes (3m wide or more), or if you need to use your projector while having lights on near the screen, it would be best to consider a projector with 5000 ANSI Lumens or more. When comparing projectors we recommend sticking to the major brands, they all use the ANSI or ISO method of measuring brightness... some smaller brands (and no-name brands you see on Marketplace websites) advertise lumens in their own method of measuring, which can result in a vastly higher (but often misleading) rating.
What Resolution is best for golf sim?
[top]A projectors Native Resolution refers to the optimal display capability of a projector, its the resolution the projector will actually display on screen. Resolution is expressed as the number of distinct pixels it can project horizontally and vertically (e.g., 1920x1080). While projectors can receive signals with different resolutions, they can only truly display images at their native resolution. Signals with higher or lower resolutions will be internally converted by the projector to match its native pixel count.
The most common resolutions for golf simulators are
- 1080p - 1920x1080 (Full High Definition)
- WUXGA - 1920x1200 (similar to FULLHD but with slightly increased height relative to width)
- UHD - 3840x2160 (Ultra High Definition 4K 2160p. Four times the detail of FullHD.)
We recommend to select a resolution of at least 1920x1080. The throw distance may decide the resolution for you though. In many cases a 16:10 1920x1200 offers an advantage as you will get an image with more height, especially handy if overspilling the screen. The 4K resolution will provide you a very decent increase in image detail however this may only be of benefit if your golf sim software is capable of sending a 4K quality image. Please refer to our question about Aspect Ratio for more information about resolutions and aspect ratios.
Should I ceiling mount my golf sim projector?
[top]Whilst some installations will require a projector to be placed on the ground or on a shelf, ceiling mounting is the recommended method to keep the projector well away from the player and as safe as possible. Many projectors can be placed off-centre horizontally to help keep the unit further away from a potential wayward shot, just look for a projector that features Horizontal keystone correction. Unless you have a very high ceiling, it is recommended to add some extra safety measures to protect the projector from the inevitable bad shot. A simple piece of material or mat having behind the projector usually does the trick. Please see our question about projector placement for some more information.
What else should I look out for when buying a golf sim projector?
[top]Home theatre Golf Simulator
Golf Simulator projectors are normally perfectly fine to be used for home movies too! Many customers set up their golf sim’s in a multipurpose rumpus room so they can also use the area for home movies.
As home movies are generally in the 16:9 widescreen format, complications can occur if you have set your projector up for a 4:3 ratio golf sim. As soon as you start playing a film the image will become wider, potentially too wide for your screen. If you need to regularly change between 16:9 home movies and a 4:3 golf sim, we recommend using a projector that features a wide optical zoom. The optical zoom allows you to adjust the image size without having to move the projector. Most short-throw projectors feature little or no optical zoom, so may not be suitable if you wish to make these sorts of adjustments.
Laser Projectors for Golf Sims
Laser projectors use a light source featuring lasers to create the light rather than a typical mercury-based lamp. For the vast majority of home simulator installations, a lamp-based projector will be a great choice. Most modern lamp projectors feature a very long lamp life so you likely would get thousands of hours of golfing in before needing to replace the lamp. A projector using a laser light source is worth considering should you be using the projector heavily. They are particularly popular in commercial golf simulators and in hospitality venues where the projector will used all day every day. Laser projectors offer a longer life to the light source and eliminate your down time when a lamp does fail, and you don't have a spare one handy for immediate replacement. Laser projectors tend to cost a more than a lamp-based projector so may not be worthwhile in every installation.
As an alternative to a Laser or Lamp projector, the LED light source has also started to become common. The LED light source comes with the same advantages of a Laser light source, although is typically only used on projectors with lower lumens (brightness).

SHORT-THROW GOLF SIM PROJECTOR RECOMMENDATIONS
Optoma GT1080HDR
1080p Full HD
S/Throw Home Projector
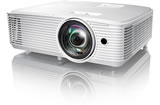
- 3800 ANSI Lumens
- REC709 Colour
- Short Throw
Optoma AZH360ST
1080p Full HD Laser
S/Throw Data Projector
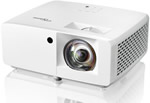
- 3600 ANSI Lumens
- Short Throw
- Long Life Laser
Viewsonic LSD400HD
1080p Full HD Laser
S/Throw Data Projector
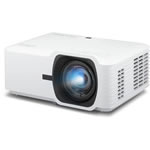
- 4000 ANSI Lumens
- Short Throw
- Laser Life up to 30k Hrs
Optoma GT2160HDR
2160p 4K
S/Throw Home Projector
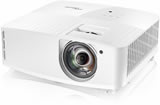
- 4000 ANSI Lumens
- REC709 Colour
- Short Throw
BenQ TK710STi
2160p 4K Laser
S/Throw Home Projector

- 3300 ANSI Lumens
- 600,000:1 Contrast
- REC709 Colour
- Smart Media Player
- Short Throw
BenQ AH700ST
1080p Laser S/Throw
Golf Sim Projector
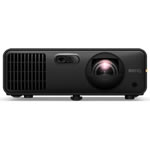
- 4000 ANSI Lumens
- 3,000,000:1 Contrast
- REC709 Colour
- Auto Zoom, Focus, Fit
- Short Throw
BenQ AK700ST
2160p 4K Laser
S/Throw Golf Projector
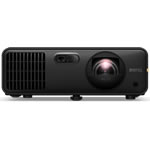
- 4000 ANSI Lumens
- 3,000,000:1 Contrast
- REC709 Colour
- Auto Zoom, Focus, Fit
- Short Throw
BenQ LU935ST
WUXGA Full HD Laser
S/Throw Data Projector

- 5500 ANSI Lumens
- 3,000,000:1 Contrast
- Optical Lens Shift
- Short Throw
Epson EB-L790SU
Short Throw Laser
Data Projector
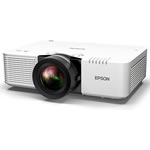
- 7000 ANSI Lumens
- 1.7x Big Zoom
- Long 5yr Warranty
- Miracast & Airplay
Epson EB-L795SE
Short Throw Laser
4Ke Projector

- 7000 ANSI Lumens
- 1.7x Big Zoom
- 4Ke Resolution
- Long 5yr Warranty
- Miracast & Airplay
BenQ LK936ST
2160p 4K Laser
S/Throw Data Projector
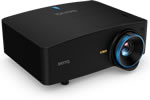
- 5100 ANSI Lumens
- 3,000,000:1 Contrast
- Optical Lens Shift
- Short Throw
LONG-THROW GOLF SIM PROJECTOR RECOMMENDATIONS
ViewSonic LS740HD
1080p Full HD Laser
Data Projector

- 5000 ANSI Lumens
- Dust Resistant
Panasonic PT-VMZ51
WUXGA Full HD Laser
Data Projector

- 5200 ANSI Lumens
- 3,000,000:1 Contrast
- 1.6x Optical Zoom
- Lens Shift
- Long 5yr Warranty
Panasonic PT-VMZ61
WUXGA Full HD Laser
Data Projector

- 6200 ANSI Lumens
- 3,000,000:1 Contrast
- 1.6x Optical Zoom
- Lens Shift
- Long 5yr Warranty
Panasonic PT-VMZ71
WUXGA Full HD Laser
Data Projector

- 7000 ANSI Lumens
- 3,000,000:1 Contrast
- 1.6x Optical Zoom
- Lens Shift
- Long 5yr Warranty