Projector How To: Instructions & guides on setting up your projector:
How to calculate projector throw distance
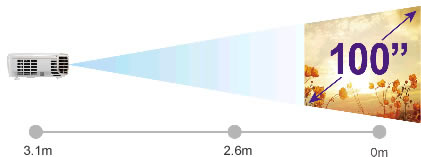
Finding the instalation point is important to make sure you do not wire up a projector in the wrong position. Every projector comes with a number called the throw ratio which can be used to calculate the instalation point of a projector. Some will even have a range when the projector has some zoom it will be able to be installed in this range between two points.
The throw ratio will usually be a number followed by a colon then another number. The first number represents the distance and the second represents the screen width. For example 1.15:1 if you have a two metre wide image would mean the instalation is at 2.3metre (2metre width X 1.15 ratio = 2.3m)
If it is a range ratio like 1.15 - 1.5 for a 100inch 16:9 (2.13m wide) screen then the calculations would look like this:
1.15 X 2.13m = 2.45 metres - Closest installation point
1.50 X 2.13m = 3.20 metres - Furthest installation point |
Most manufacturers will then advise to round these numbers up and down by 5% in case there is a slight variance among models. After rounding it would be 2.6metre to 3.1metres.
How to connect you Windows laptop or tablet to a projector with a cable
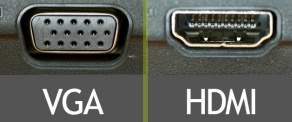
A wired connection is still the most reliable and best quality way to connect to a projector. It is also the quickest if you have visiting presenters there is no software to be installed just plug in a cable and away you go. Most windows laptops will have a VGA or HDMI port. Where available we recommend using HDMI.
Steps to setup a wired connection between your laptop and projector:
- Connect the HDMI or VGA cable to the projector then the laptop/tablet.
- Turn on your projector. Windows at this stage should recognise the connected projector.
|
 |
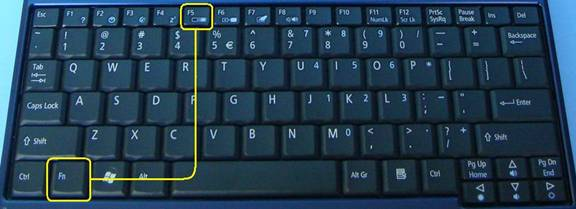
- On your laptop press and hold down the FN key and then tap the Display Toggle key to select between viewing the display:
-
only on the laptop screen,
- only on the projector, and viewing the display
-
on both the laptop screen and the projector.
The Display Toggle key will vary between laptops so consult your laptop operation manual for the precise key. It will be one of the F keys on the top row should have a picture of a little monitor. While holding down the FN and the Display Toggle key down a viewing option selection box similar to below will appear. Once you have the preferred viewing option highlighted, release both the Fn and F toggle key to start using that option.
**Some computers will struggle when showing a picture on both the projector and laptop. You can select to show the image on the projector only if you notice the laptops performance is effected.
|

|
- Adjust the laptop output resolution to match the native resolution of your projector.
From the Windows 7 right click on a blank desktop, click then select "Adjust Resolution". Select the projectors' native resolution this will give you the best image quality.
|
Setting up Easy MP wireless network projection for your Laptop or PC to an Epson Projector
Connecting your laptop or PC to an Epson projector wirelessly can be handy for still image presentations. Wifi is a little too slow to do full motion video but with presentations and still images can be quite handy to avoid cables.
Steps to setup your wireless projector with a PC or Laptop:
- Some Epson projectors will have wireless inbuilt while some will require an optional dongle to be installed. If your projector needs a wireless dongle to be installed then insert that into the USB port.
- Download "EasyMP Network Projection" form the CD or Epson Australia website
- Install the software onto your computer
- Turn the projector on and set the source to Wireless (LAN).
- Check your computer Wifi is turned on. Some laptops will have a button to turn this on and off near the keyboard.
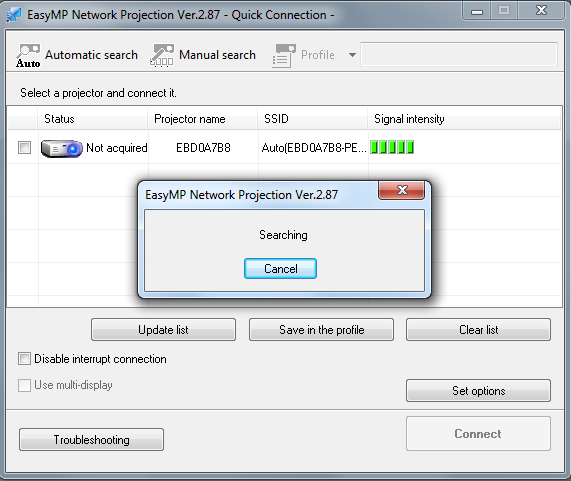
- Open up "Easy MP network projection" on your computer - Selecting quick connection mode
|
HP Laptop Wireless Button pictured. White is enabled - Yellow is disabled.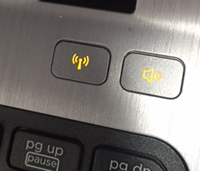 |
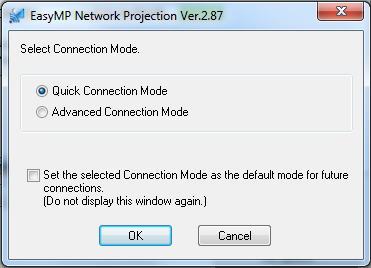
|
- If you have a firewall a pop up may appear to add an exception to allow easy MP to bypass it. Click "Yes".
- Easy MP will do a search for a projector. Select the projector in the list. Then click "connect".
- The connection process will take around 20 seconds. Once connected the laptop/computer screen will appear on the projector.
|
Wirelessly connecting your iPad or iPhone to an Epson projector
 |
For presentations on the go using Wifi to connect to a projector can be quite handy. You can do everything from filming an object or document to put it up on the big screen or projecting photo's and documents from your iPad. |
Steps to setup your wireless projector with a iPhone or iPad:
- Open the "App Store" for apple or "Google Play" for android
- Download "iProjection"
- Turn on the projector
- Select wireless(LAN) as the source.
|
 |
- A big square barcode will appear on screen this is called a QR code.
- Open the iProjection app on your phone or tablet.
- Click read "QR code".
- Point the tablet or phone camera at the QR code until the app scans it.
- A message will pop up to "register Wifi profile" do you want to continue select "Ok".
- An installation screen will pop up. click "Install"
- Password field will pop up for your iPhone/iPad. This is your iPhone/iPad password to make sure the owner is installing the Wifi profile. Enter Your password.
- A warning will appear that the profile is not signed. Click "instal"
- Then "instal" again to confirm.
- Click "done".
- Confirmation screen will pop up. "Open this page in iProjection?" Click "Open"
- iProjection will open up and search for then connect to the projector. Click "OK" once the connection is established.
- The projected image should go black.
- You can now use the app to show your camera, photo's and documents saved on your tablet. Tap the menu button to access the iProjection app features. These will vary depending on whether you are using an iPad or iPhone.
|
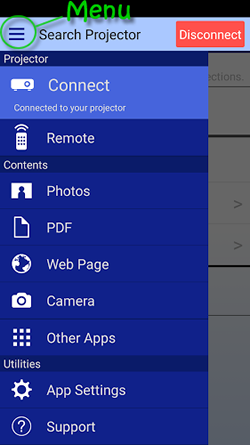 |
|


